It’s been a cold week, but today seemed to mark a turning point in the weather here. I took my coat and gloves back off; my gloves had been put away for the summer two weeks ago, only to be hastily retrieved when the cold winds arrived. In some parts of the country snow has fallen and beekeepers have not found an opportunity to do a first inspection yet.

I lit my smoker and approached Demelza’s hive – I always inspect that hive first as it’s calmer. I still couldn’t spot Queen Demelza, and her workers had not made a start on drawing out the frames in their super. Perhaps they will now the weather seems to be warming up again. I saw eggs and brood across about six frames, and the colony seemed content and calm.
On to Kensa’s hive. I had left them a super of honey on over winter, which I now think was a mistake. They probably had too much space to keep warm, and now some of the brood has chalkbrood disease. The queen had also begun laying in the super, making it a colony on a brood-and-a-half system. I dislike this, as it means inspecting two boxes, and the two frame sizes are not interchangeable. I needed to find Queen Kensa this week for the next step in the Bailey comb change I’d started. I began by moving the top super box a few feet away and keeping it covered with the crown board to keep the bees calm. I placed the super box on top of the upturned hive roof, so that if the queen was there and fell down she would fall into the roof rather than on the ground.
I then spent some time inspecting the frames in the brood box. The colony was only using about half of these at one end of the hive. I also took the opportunity to slowly and gently remove comb sticking up from the top of the brood frames, using my hive tool. Unfortunately the bees became more and more agitated, and I couldn’t spot the queen.
The mood of the bees gave me a clue that perhaps Queen Kensa was in the super a few feet away. The bees very quickly notice if their queen goes missing and you can hear the sounds of the colony change slightly. I covered over the top of the hive and moved over to the super. Moving the brood away is a good trick with an aggressive hive, as the flying foragers are more defensive than the nurse bees that stay with the brood. The bees in the super were in a very different mood, with a busy but peaceful hum. I decided the queen must be with them.
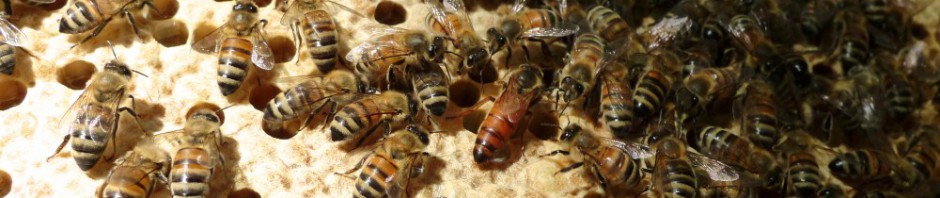
I carefully ran my eyes over the frames, turning them over and taking in all the bees. About three frames in, I saw her. And then I didn’t. My eyes lost her for a second and she disappeared. I turned the frame over a few times before spotting her again, long and chocolate brown. That is how easy it is to lose an unmarked queen.
Returning to the brood box, I removed the half of the frames that were empty and filled them with some of the super frames of brood. I placed the queen excluder on top and then Queen Kensa on the super frame I’d found her on, plus the new brood frames added last time. Once the brood below hatches out, I can remove the old frames and get them down to one brood box with mostly new comb. Not a perfect Bailey comb change but a good start. I plan to mark Queen Kensa next week now I have narrowed down where she is. I was feeling quite tired out by this point!
I can already think of some things I’ve done wrong, but never mind, hopefully the colony is moving in the right direction and I’ll sort it out on the next inspection.
By the way, does anyone know how to edit images in the WordPress media library to make their dimensions smaller? I used to know how but the option seems to have been removed. I can see how to make images in posts smaller but it looks like the original images in the media library remain the same size and take up more space.


There is a scaling option in the Media Library.
You click on a photo, and it should open a window showing the photo and associated information.
Below the photo, you should see “Edit Image”.
Clicking that box opens the window where you can scale, rotate, crop, and flip the image.
LikeLike
By the way, it’s probably easier to resize them before uploading them.
This is what I use for quick resizing (free to home users):
https://www.faststone.org/FSResizerDetail.htm
but there are others.
But, if you’re trying to save space, then I would play with compression before you upload them. There is a big difference even between 80% and 70% quality. You can probably go down to 60% JPG quality without a noticeable difference, especially for photos that will likely be seen on a phone.
One other solution is to link them from the source. If you use Google, they give you a fair amount of storage and automatically back up the photos. You should be able to then link them on a WP post (although I’ve not tried it for a while).
LikeLike
I think I’ll have to do as you suggest and compress before uploading – thank you 🙂
LikeLike
Finally, if those are phone photos, there are various editors on Android (and I assume Apple) phones for resizing and compressing files. I use Snapseed for editing/processing, and Pixlr for outputting a smaller and compressed version.
LikeLike
I’ve done this right before replying to you on the 13th.
The thing is you need to read this post and switch on the Advanced Dashboard as described in this post:
https://wordpress.com/blog/2021/03/30/wordpress-com-design-update-for-a-more-intuitive-experience/
It’s also described here (this second link will put the comment in moderation, so I hope you eventually see it):
Once you make that switch, you’ll get the old Admin dashboard (with a few modifications) and that’s the one that still lets you use the Classic Editor. It also has the Media Library interface that has the resize option. At least it does for me.
Let me know if it works (or not).
LikeLike
A thousand thank yous! That worked!! Now I can use the classic editor and resize photos once again. That post was so helpful. Fingers crossed there is no more fiddling about with it all from the folk at WordPress, so that we can continue to use the classic editor and media library in peace 🙂
LikeLike
Glad to hear it . . . however, I still say it’s easier to resize before uploading, especially with the one I’m using.
Also, many cameras (and phones) have settings allowing you to choose what size photo you want to capture. If you’re not doing much post-processing or printing, you might as well have the camera save photos close to the size you want.
Also, if you’re using a Nikon camera, their new NX Studio has export options that lets you change sizes and/or compression and it gives you an estimate of the exported file.
If you want to keep the full-size photos and don’t have a Nikon, most cameras come with software for downloading images from the camera to the PC that include resizing for emails, social media, and what-not.
Hope that helps.
LikeLike
Hi Emilio – have you done this in the past month? This is how I always used to edit and resize my photos in WordPress, but it now only gives me the rotate, crop and flip options. I can also no longer access the classic editor 😦
LikeLike
I’m in the middle of something. I’ll reply later.
But, there is a quick post I recently did about the latest change and how to get to the old menu.
LikeLike
Hi Emily
Your can use the Smush plugin to compress images in situ, and you can resize them in Media Library as @disperser says. A few years ago I replaced my entire image library having resized and compressed them – saving hundreds of megabytes and speeding things up. I use Lightroom to produce watermarked images of the right size and then compress them before upload using ImageOptim (https://imageoptim.com/mac) which is a Mac application or available as a web service.
If there’s a good nectar flow your bees will build brace comb below the super frames … if this includes the first lot of drone brood of the season you can remove it AND get rid of quite a bit of Varroa at the same time (because it’s attracted to drone brood much more than worker).
Cheers
David
LikeLike
Thanks David. In the past month the Media Library no longer gives me the resize option, just crop, rotate and flip. Maybe part of WordPress’s annoying changes recently. I don’t have any fancy photo editing software but will see what I can do before uploading.
That was one of my worries, that the bees will build brace comb below the super frame I added to the top brood box and it will get a bit messy. As you say I can remove the drone brood (though I always feel a bit guilty doing that – I’m really too sentimental to be a beekeeper!)
LikeLike
Well done! I have never marked the queens. I have got as far as buying the catcher – but not the marking pen. I think I get concerned with leaving the hive open too long while I am looking. I must get courage one warm day to try again. Amelia
LikeLike
He he! I used to mark my queens more often when I shared hives with Emma but have got lazier since and not bothered with marking so much. In France I don’t think you need to worry so much about the warmth. You could use a cover cloth to cover over half the hive while you look for her. The queens are usually shy and like to run for the dark spaces unfortunately!
LikeLiked by 1 person
The cloth idea is good. I keep forgetting, and of course patience.
LikeLike